UNBEATEN PATH TOURS & YOGA 707 888 6121
  • Home
  • Guided Experiences
    • ALL TOURS & GENERAL INFO
    • THE SEA RANCH ARCHITECTURE & NATURE
    • REDWOODS TO COAST
    • SIGILS WALKSHOP
    • HIKE, WRITE & DESIGN
    • Breath-Body-Mind
    • STORNETTA LANDS NAT'L MONUMENT
    • SEASCAPES AND WILDFLOWERS
    • ELOPEMENTS
    • BREATH WALK & FOREST BATHING
    • YOGA & CORPORATE RETREATS
    • LARGE GROUP OPTIONS
  • THE SEA RANCH
    • THE SEA RANCH
  • Resilience WALKshops
    • ABOUT OUR WALKSHOPS
    • SIGILS WALKSHOP
    • HIKE, WRITE & DESIGN
    • Breath-Body-Mind
  • RETREAT WORK
  • YOGA
    • ABOUT YOUR TEACHER & GENERAL INFO
    • PRIVATE YOGA SESSIONS
    • SOUND BATHING
    • YOGA STREAMS
    • YOGANATUR - HIKE & YOGA
  • BOOK ONLINE
  • CONTACT+
    • OUR BIO
    • WRITE A REVIEW
    • UNBEATEN PRESS
    • CONTACT US
    • FAQ
    • BLOG
  • Waiver & Policies
  • Buy our Beanie!

Food 4OREthought:)

Dear Food: 

Will you marry me?  I LOVE YOU!  This blog is dedicated just to you. I celebrate you by sharing my "made from scratch" recipes.
Nutrition Facts. org

Madge's Morning Posh Nosh!

9/28/2013

2 Comments

 
The world is like a mirror -  Smile, and your friends smile back. - Japanese Zen Saying 
I love texture - So my breakfast cereal has to pack a punch with each spoonful! 
This cereal features nicely simmered Quinoa (Keen-wa), flaxmeal, almonds, sunflower seeds, raisins and blueberries.  And, of course, I add my own Indian cuisine-like flare.  The result is a nice blend of creamy crunchiness with a touch of warming spices and sweetness. Recreate this meal with your own flare - see my recipe below and enjoy!
Pic by Madge
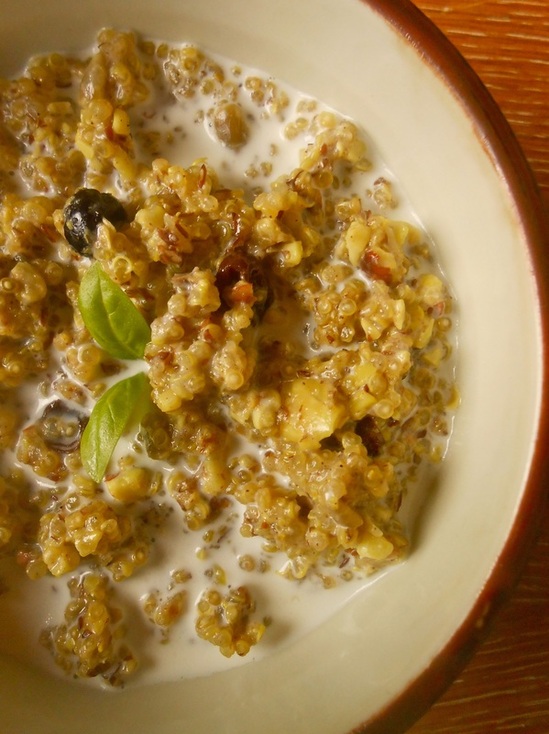
Pictures by Margaret Lindgren
Ingredients: 
  • 2.5 cups water
  • 1 cup Quinoa
  • 1/4 cups flax meal
  • Handful  (.5 cup of almonds)
  • 2 TBSP (or more) of sunflower seeds
  • 1/4 cup (more or less) of dried raisins and dried blueberries (preferably your own dried fruits)
  • 1/4 tsp tumeric
  • 1/4 cinnamon
  • 1/4 ground cardamom
  • dash each ground nutmeg & black pepper & pinch salt

NOTE:  I so wing it when it comes to adding spices - so add what works for you.  

Directions: 
  • Pulse nuts in food processor or chop into manageable bits to eat
  • Bring water to a boil on stove
  • Once water has boiled add all ingredients to water and cover
  • Turn to low-ish & simmer covered for approx. 12 minutes or until water is absorbed -  being sure to stir every couple of minutes near the end so things don't stick
  • Once water is absorbed, pull off the stove and let sit covered for 10 minutes
  • Fluff and put into bowls
  • Add almond milk, soy creamer or milk & a swirl of maple syrup or honey (I like to add my own homemade almond milk - so yummy)

Enjoy and eat with gratitude in your heart!
2 Comments

Fudge it Fudge Balls. 

6/25/2013

1 Comment

 
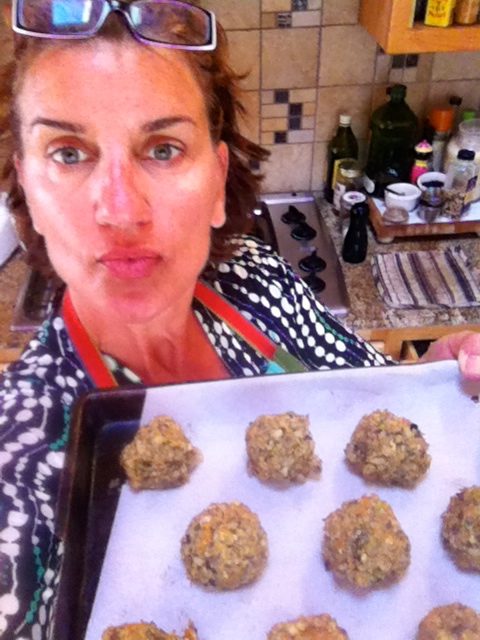
You've got guests coming for dinner. You want to have a dessert but don't have the time.  What to do?  Here's my answer and it's healthy and pretty to look at, to boot! Wow! 

Where we live (there are no traffic lights here, if you can imagine). So we don't have many choices for stores or shops - many times it is necessary to rely on our own devices to "cook" something up in a jiffy. This is what I did to solve my dessert dilemma.  And the best part is that our guests wanted to take some home with them.  That's always a nice thing to hear. 

What is it, exactly? Basically, it's a chocolate fudge ball made from ground nuts, leftover granola, remains of some cocoa powder, a melted cube of bittersweet chocolate, some tahini, spices & a spoonfull of orange marmalade for moistness - ALL balled up and rolled in sesame seeds.  YUM!  See how below!
Picture
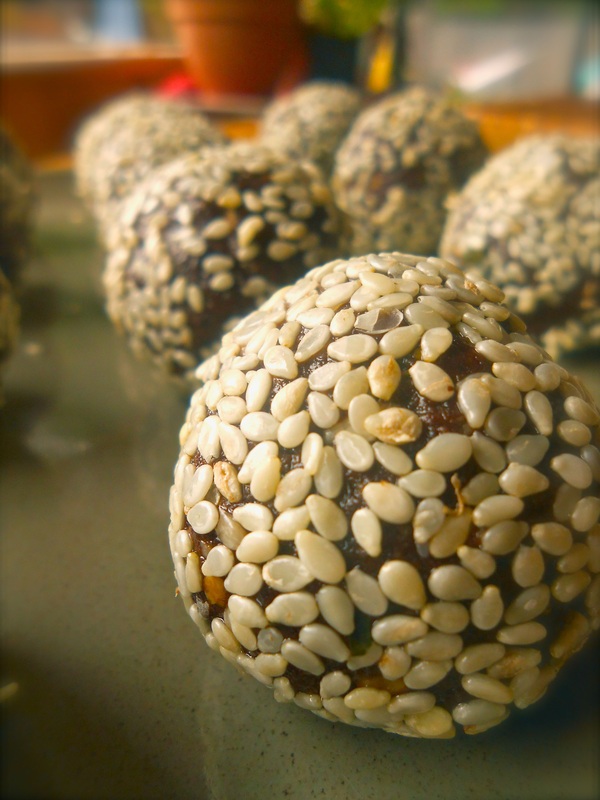
So HERE's HOW TO WING IT!  

THIS "RECIPE" made 12  small Fudge Balls (about 1" in size)
I used several different kinds of nuts that I had on hand.  About 1/2 cup each of 3 types (or use what you have) but it should total about 1.5 cups of nuts.  In my case I used: 

INGREDIENTS
  • 1/2 cup almonds (all seeds can be raw or toasted - but try not to use salted seeds, if possible)
  • 1/2 cup sun flower seeds
  • 1/2 cup homemade granola I had leftover
  • 1 or 2 1oz cubes of Bittersweet chocolate melted in microwave until soft and stirred with forth until smooth. *Note: if you don't have this on hand - use something that is chocolatey.  I had a piece of leftover torte in the fridge, I could have use this.  OR - you could use Cocoa Powder (pure powder). 
  • 1-2 TBSP of cocoa powder (this amount depends on consistency when all ingredients are pureed)
  • 1/4 cup Tahini (don't have tahini - try using almond butter - it will change the flavor but go for it, try it!)
  • 2 TBSP or so of Agave (if you don't have it - double up on Marmalade or a berry jam)
  • 1 medium spoonful of Orange Marmalade 
  • 1/4 tsp of nutmeg
  • 1/4 tsp hot chile powder
  • 1/4 tsp Allspice 
  • 1/4 tsp kosher salt (or more to taste ... not tooooo much, though)*Note: I didn't have cinnamon on hand - but I definitely would use this as well - goes great with chile powder!
  • 1 tsp Water (at a time) if mixture is too dry at the end of the process to mold into balls - add one and mix, then check ... DO NOT ADD WATER unless you need it. 
  • Sesame Seeds to coat fudge balls (see how in picture below)

INSTRUCTONS

  • Puree the seeds/nuts/granola until it becomes a fine meal
  • With the blades spinning, slowly pour in the tahini and agave
  • Add melted chocolate, cocoa and remaining ingredients except the water - see how the mixture looks (I wait until the end, taste the mixture and if it needs more chocolate, salt or spice that is when a I add more - REMEMBER - this is YOUR DISH when you serve it to people - taste it and make it to your standards)
  • Check consistency - if it is too mealy or dry then add a bit of water (or a bit more marmalade) and mix with your hands until it can form a ball - it DOESN'T TAKE MUCH for it to form so do not over water - if you do, add more cocoa and slow down:)
  • Let mixture sit at room temp for 15 minutes then form into 1" balls with your hands 
  • To coat: Pour sesame seeds into small bowl, place your fudge ball inside the bowl and swoosh the bowl in small circles so that the ball inside rolls around and coasts itself in the seeds:)  SO EASY 

Picture
<---------- that's how you swoosh:)

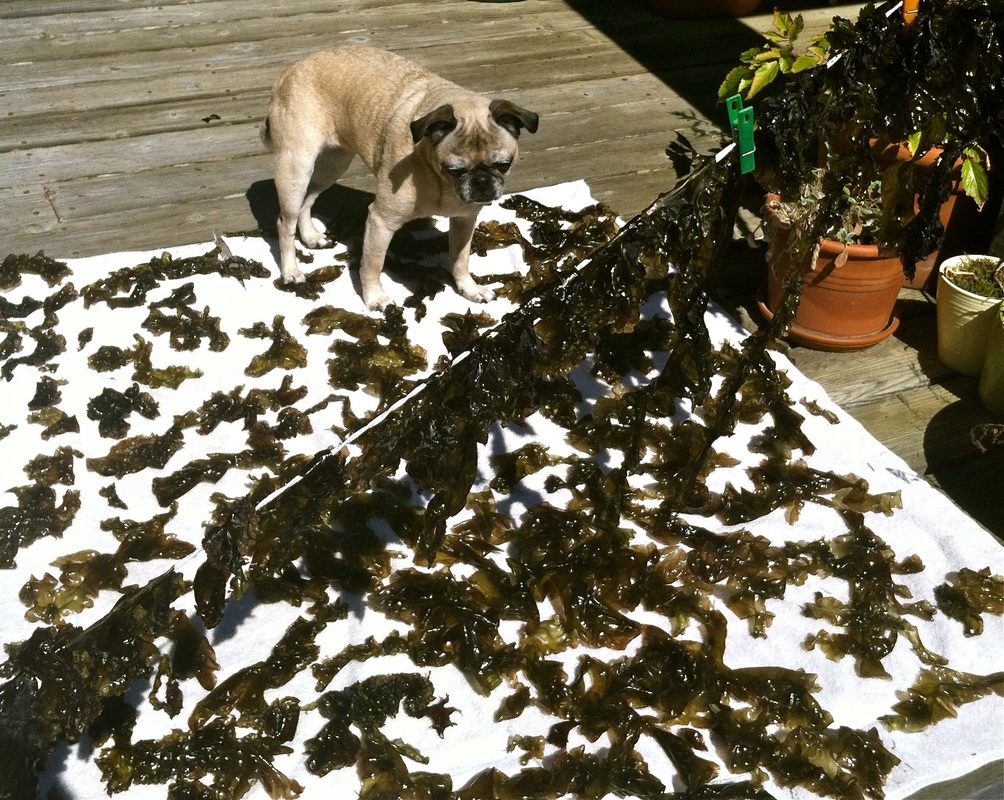
When your fudge balls are all done and coated plate them and store in refridge.  They will harden - so, I remove them about 1 hour before dessert to let them soften a bit.  If they are too big cut the fudge balls in half with a sharp knife - you don't want to loose their shape - so don't squish - and plate stylishly atop one another. 

These Fudge Balls pack a tasty punch - so it is good to serve them with an after dinner drink that will balance their richness.  I serve them with coffee spiced with ground cardamom or with cinnamon (I love cardamom - but it is not for everyone).  HMMMMM GOOD!

1 Comment

Glory B to Nori!!! 

6/9/2013

0 Comments

 
Picture
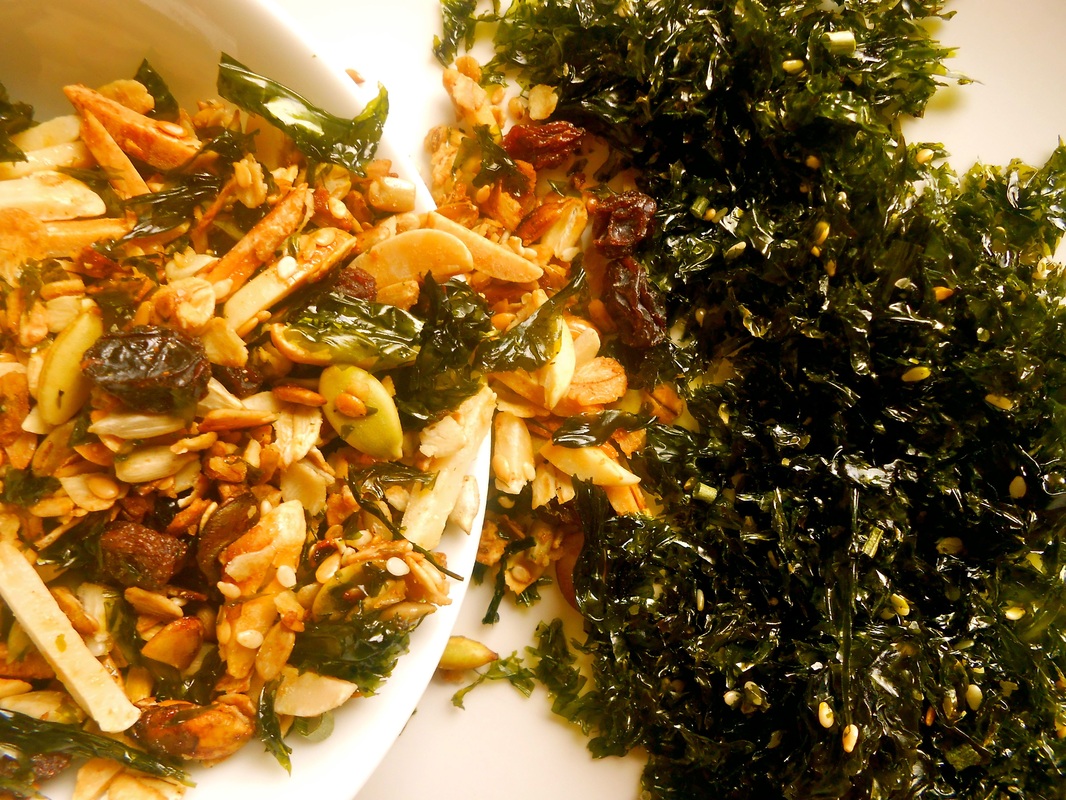
I make just plain granola and mix my dried Nori with it... so scrumptious!
Ahhhh ....Nori Seaweed.  Many of you know Nori as the green seaweed wrap used in Sushi cuisine.  Here on the Mendonoma coast Nori grows abundantly wild along with many other edible sea vegetables.  One doesn't need to harvest much to produce a lot of dried/finished product!  A small zip lock bag full of Nori for my personal consumption is enough to last a very long time - and for this I am forever grateful to nature!  What a treasure it is.  I harvest it, dry it in the sun and then roast it with sesame seeds and a bit of sesame oil - once done I flake it down and put it into jars and use it as a roasted snack, in homemade granola or sprinkle it virtually on any foods I eat... I even put it into my breakfast cereal!  It is THAT GOOD! and incredibly nutritious. And for those concerned about a "fishy" or brine-like flavor ... FEAR NOT!  Roasted Nori has a salty, nutty flavor and it is tastier with a sesame flare. 

Nori (Porphyra porforata) is a rich source of vitamin C and contains up to 25% protein by weight. Nori also adds vitamin B12, carbohydrates and trace minerals to your diet. It is the seaweed highest in protein, iron and vitamin B-12. In fact, there is no land vegetable that packs the same kind of nutritional & mineral rich punch as NORI or any fresh Sea Vegetable for that matter.  Not one!

Here on the Mendo Coast one may harvest no more than 5 lbs a day for personal use.  And, believe me, 5lbs is WAY TOO MUCH.  I pull about an 1oz of the stuff and it lasts forever! I harvest responsibly - so, if you choose to harvest be sure to talk with someone that does harvest and do so responsibly.  It makes you appreciate it more when you do the proper homework and research to collect this precious gift. 

Madge's Homemade (vegan) Nori Granola Bars!

Picture
Picture
My roasted sesame seed Nori - a deep emerald green color after roasting.
Picture
My pug Bubble is inspecting my drying process!
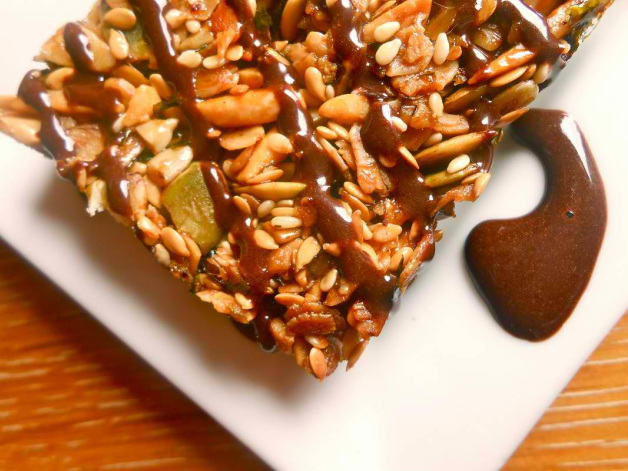
How to prepare Nori:  You can purchase Nori dried in its raw/harvested form.  Look up Mendocino Seaweed retailers.  Or if you have some that has been harvested and dried in the sun this is what you can do:  Grease your hands with sesame oil and massage the dried Nori, ensuring that you have coated it as best you can with a very thin layer of oil from your hands.  Sprinkle with raw sesame seeds, spread on a cookie sheet and bake in a 300 degree F oven for about 5 minutes being sure to check on it every 2 minutes.  It should turn a rich emerald green as shown above in my photo.  I then jar this in an air tight glass container and store it in the pantry.  Actually , I always have it out and use it in everything. 


**IMPORTANT TO NOTE:  For those not familiar with eating this type of nutritional vegetable - it is important not to overdose on eating this.  It is rich in Iodine and Iron - so, it is important to take a break every two weeks or so.  Our american diets are not rich in seaweed normally (but they should be)... so, if you are pregnant or have iodine issues - please be sure to check in with your practitioner and do some reliable Internet RESEARCH. 

Vegan Granola Bars with a Cocoa/Vegan Chocolate Sauce... 
  • 1/4 cup Agave nectar or maple syrup (if you have sugar issues, the agave acts as a binder for this. I haven't tried a sugar substitute for this - but you would need something that will "bind" the food - Flax seed meal soaked in water until it is a paste might work as a binder - but I haven't tried this alternative either). 
  • 1/8 cup Grape seed oil
  • 1 cup raw, slivered organic almonds
I use an approximate HANDFUL of the following raw nuts/seeds: 
  • pumpkin seeds
  • golden flax seeds
  • sunflower seeds
  • walnuts
  • sesame seeds
  • Gluten Free Oats (I use Bob's Red Mill) - about 1 cup
  • 1/2 cup or more of freshly roasted Nori sesame flakes. 
  • 1/2 teaspoon hing (garlic substitute)
  • 1 tsp red aleppo pepper flakes or any kind of spicy pepper flake
  • 1/2 teaspoon sea salt

INSTRUCTIONS
Preheat oven to about 325 degrees F. 
  • Combine oil and agave nectar in a small saucepan on stove and bring to a rolling simmer being sure to constantly keep stirring and moving the liquid in the pan.  Simmer for a couple of minutes until it thickens but don't simmer too long or it will turn into candy.  Be sure not to let it get too brown or burn either.  Just so it thickens. 
  • Remove from stove and add in all ingredients and combine thoroughly.  The ingredients will be covered and sticky but the granola itself will be kind of loose (not in a big huge clump)
  • Spray an 8" x 8" glass brownie pan with vegetable spray and then spread granola mix into pan being sure to press it down firmly so that it is fixed and flat.  It will seem a bit loose but will definitely be flat and sticky. 
  • Bake for about 25 minutes being sure to check on it after 15 minutes and then every 5 minutes after that until the granola is browned and the edges are browned.  Do not let burn (yuck!).  
  • Remove from oven and allow to cool thoroughly.  When you first remove it - it will seem like it is not sticking together or is even crunchy ... but don't worry!  After it cools thoroughly it will be crunchy and you will be able to cut pieces with a sharp knife
  • Cut into squares for a nice snack or top with my Vegan Chocolate sauce for a healthy dessert.  See chocolate sauce receipt below. 


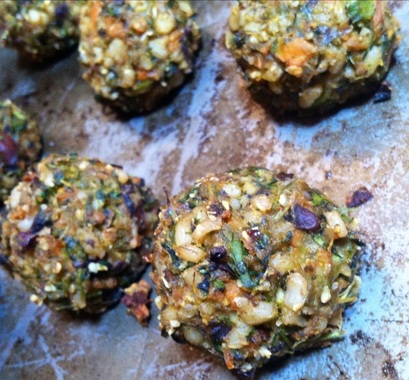
VEGAN CHOCOLATE SAUCE:  1 TBSP Dark Cacao powder mixed with 2 TBSP of agave nectar ... mix slowly until well blended (it is a bit of a bear to mix initially but it slowly begins to come together.  Check consistency and add more agave nectar to thin this sauce out.  That is it. 


0 Comments

I can't believe it's not .... Meat Balls!????

6/4/2013

3 Comments

 
This is a good one! A vegetable (vegan) "meat" Ball that is packed with so much flavor you will never eat a meat ball ever again!  This is also a terrific recipe for your non-vegetarian/vegan friends, too!  They will truly be amazed by the flavor and texture of these vegetable balls. I especially love the texture - as this is so essential to my food eating enjoyment! The veggie balls have a much better texture, I think, then meat balls - they are a bit softer but keep together and have such a great, flavorful bite! I eat these just as they are (heated or cold) or serve them with a simple vegan sauce (like a "creamy" (tofu) green onion sauce or tomato sauce).  I usually make a batch that I eat as snacks or as a quick meal and I freeze the others for later dinner quickies.  

I am grateful for finding this recipe in a cookbook I purchased at a yard sale.  The cookbook was published in 1990 and is called Vegan Delights by Jeanne Marie Martin.  Her recipes are terrific in this book --- best I have seen and tried yet ... and I always put my own variation on these recipes.  Thank you Jeanne Marie! 
Madge's Simply Satisfying Menu Idea of the Day
"Dinner with Friends"  
Be sure to keep appetizers to a bare minimum as your main course will be filling & hearty! 
For your starter course: 
Freshly tossed, peppery arugula or mixed baby green salad with a lemon or mustard vinaigrette 
(get those digestive juices flowing!) 
Main Course:
Fettuccine & "Meat" Ball main course with a nice Cream or Tomato sauce (comforting and filling). 
Rest for a bit before your final course! (play a round of cribbage or sip some wine) 
*As a lighter alternative - skip the pasta and serve wrapped in lettuce or with steamed veg that's
topped with your favorite sauce! 

Dessert: 
Lemon or basil sorbet!   
Check out the recipe below! 
Another great way to serve these to your heavy-duty meat eater friends would be as "Meat" Ball Grinders (sub sandwiches) with a good o'l New England Italian Gravy Sauce!  - and make sure it's TOASTED!
Picture
Picture

Brown Rice Vegetable Balls

Note: You can use Millet, Quinoa or Short Grain Brown Rice.  Make sure your Brown rice is cooked with a little extra water for extra tenderness (I use my rice cooker as per instructions and this was perfect) and if you use Quinoa make sure it is actually a bit less tender than normal (1 and 1/8 cup quinoa to 2 cups water) - I haven't tried the Quinoa yet but this is the recommendation in Jeanne Marie's cookbook.  

ALSO - I HIGHLY recommend the use of a food processor to process the vegetables for this recipe - it is best that each vegetable is pulsed to a small size (chopping would take a long time) and it makes things go quickly - IF YOU DON"T have a food processor - try grating the vegetables on a large grate setting (except the onions).

  • 2 Cups cooked Short Grain Brown Rice
  • 1/2 cup hazelnut flour OR 1/2 cup ground almonds (I used ground almonds - ground in my processor)
  • 2 TBSP arrowroot powder OR unbleached white or kamut flour

Note Below - I pulsed each veg separately in my food processor
  • Preheat Oven to 400 degrees F. 
  • 2-3 TBSP natural oil (grapeseed, etc)
  • 1 Cup chopped Onion
  • 1 Cup chopped Carrots
  • 1 Cup chopped Broccoli 
  • 1 Cup chopped Celery
  • 1/2 Cup chopped Kalamata or Black Olives (I use Kalamata)
  • 2 Cloves minced Garlic (I use about 1 tsp of Hing)
  • 2 minced Green Onions (all parts)
  • 3 TBSP minced/chopped Cilantro
  • 2 Vegetable Bouillon cubes (you can use low sodium - but be sure to use high quality bouillon)
  • 2 tsp Miso paste (I used a chick pea miso paste that was totally delicious)
  • Dash of Soy sauce
  • 1 tsp dried dill weed
  • 1 tsp paprika
  • 1/2 dried thyme

Optional - 1/2 cup chopped nuts of choice.... I did not use nuts and found that these "meat" balls great texture!

INSTRUCTIONS

  1. Mix the first three ingredients separately.  
  2. Heat the oil in a heavy pan and saute' the onions, broccoli and carrots until semi-tender.  Add the other vegetables and saute' 1-2 minutes (if you are lazy just plunk all your veggies and olives into your preheated, lightly oiled pan and saute' until tender). 
  3. Add remaining ingredients (spices, bouillon, etc.) and mix thoroughly (break up that bouillon! and be sure to mix in the miso paste)) and saute' for another couple of minutes until the flavors all blend - DO NOT SALT - those bouillons and miso paste should be more than enough!  
  4. Remove the saute' from the heat and mix it well with the brown rice & flour mixture. I use a hard paddle spoon and "cut" in the ingredients, you want to make sure you maintain the integrity of the cooked rice grain.  Roll into small balls (about 1/8th of a cup).  Bake balls at 400 degrees F for 18-22 minutes... don't move them - the bottoms will brown nicely - just leave it at that and don't mess with a great thing:)

Remove when done and serve as desired... I just plunk a couple on a plate with a nice salad and have lunch right then and there... I then save the rest for later or for a dinner party (see my storage of them below)!  ENJOY these as much as I do!  
Picture
3 Comments

Eggplant Huggies ....

5/15/2013

0 Comments

 
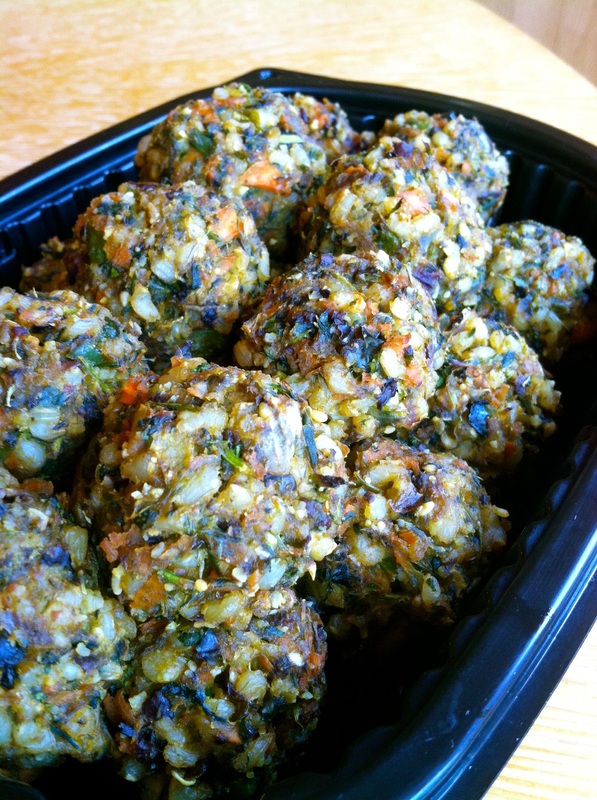
Who knew? Eggplant as a healthy, flavorful, supple and tasty soft taco shell!  Fill these soft, grilled eggplant rounds with your favorite grilled food and salsa  These were FANTASTIC! My sample here may not look the prettiest. In my case, my grill wasn't working so I just lightly broiled the eggplant. But with a grill you get nice grill marks and wonderful color!  I got the idea from Pinterest and put my own twist on it ... See how below. 
Picture
Picture
  • One large (in circumference) eggplant (regular) 
  • Slice eggplant thinly about 1/8" to 1/4" thick
  • Mix 1 cup water with 1/4 cup Soy Sauce or something similar - I add a dash of garlic and a bit of sesame oil (you can make them have an Asian flare - or spice with chiles, etc for other fine taste appeal)
  • Place eggplant into container pour water/soy mixture over eggplant and mix thoroughly
  • Let marinate for 24 hours if possible or several hours at least
  • Once the eggplant has marinated - prepare grill for hot grilling
  • Place eggplant rounds on a grill dish and place on grill (I use this so the rounds do not fall in)
  • Grill eggplant so that each side is dry but not overly grilled or browned (want them to be supple/not fall apart)
  • Remove from grill - cool and brush lightly with your favorite oil if you desire (I use a chili oil for a little spice) 


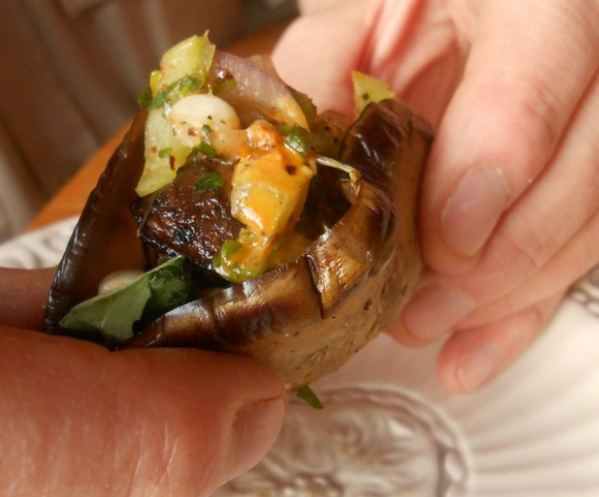
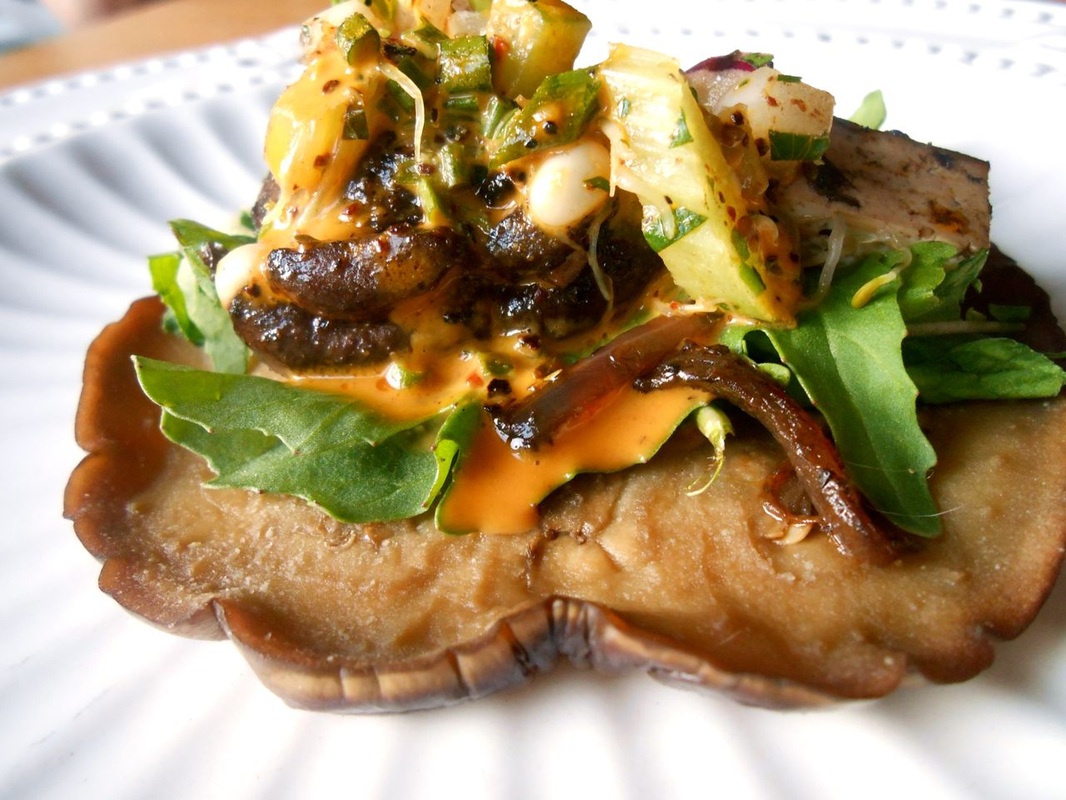
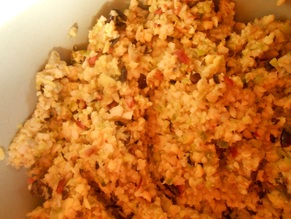
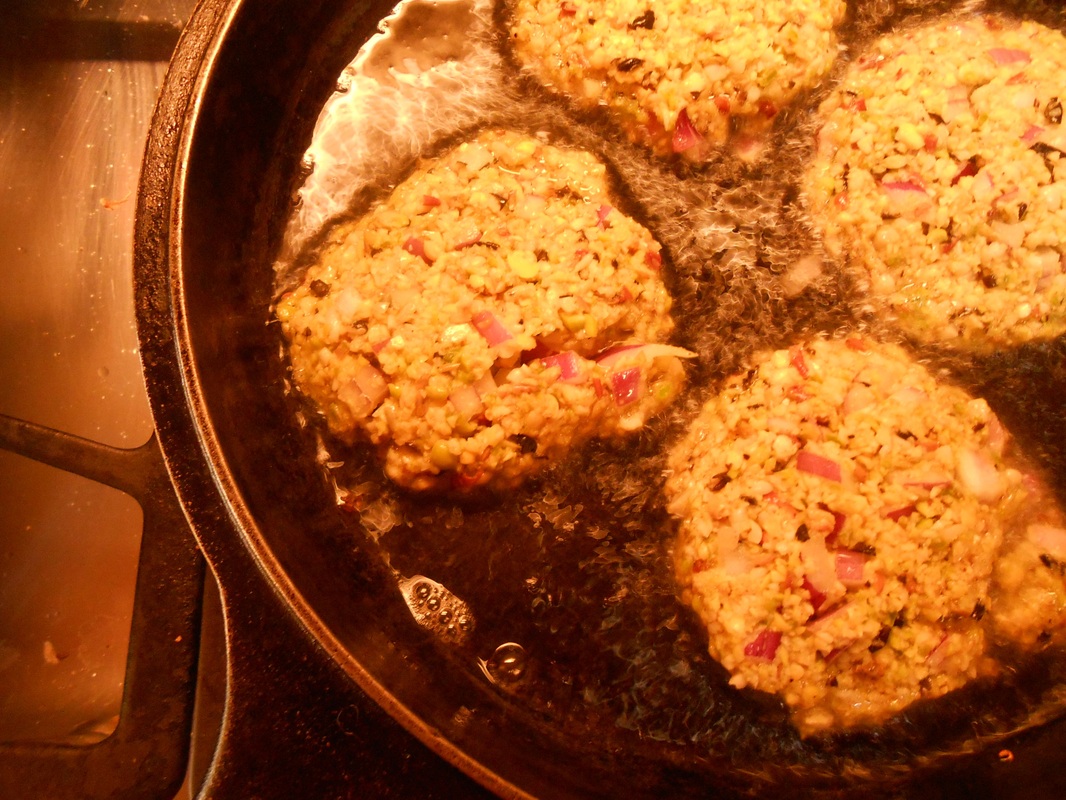
Then add any goodies you like having on a taco.  In the picture above I prepared mushrooms, firm tofu, onions and olives on the grill.  I then added a yummy celery salsa (recipe to come) and topped with arugula and a my miso/carrot dressing.  

These were to die for! and my husband was totally into them.  My only thing:  I prefer not to have the skin - it is important to slice them thin enough or to cook them just long enough to soften the skin on the eggplant.  Otherwise, these were terrific and they are sooooo moist and tasty.  Awesome!  Will definitely do it again!! 
0 Comments

Beans with Means! A fritter that takes care of your needs!

5/3/2013

0 Comments

 
This is my own version of a beanie - mixed legume - burger patty that ROCKS all the senses!
I'm back and I am hungry!  After conducting a wonderful wild flower tour this morning I had a craving for something crunchy, tender and flavorful that would go great with a mixed green salad or on a big fat bun with hot sauce, tomatoes and pickles!  Luckily - I had a batch of mixed legumes that I had been soaking in water for about 24 hours... primed perfectly to make the most fantastic, crunchy bean fritters around.  
Check out the recipe below. Note: this is one of my "once in a while" treats because the patty is pan fried and I don't normally like to "fry" things.  But, BOY! is it good.  I have it prepared here on a bed of mixed greens with with a yummy lemon, tahini vinaigrette ... Delicious!
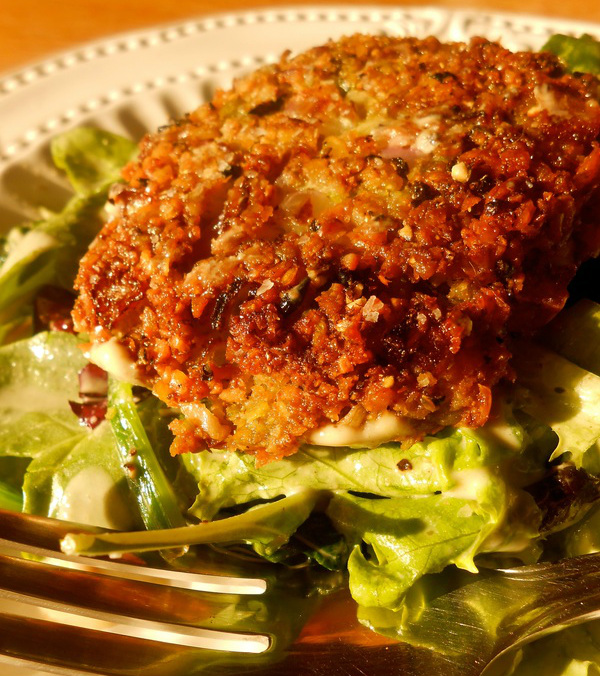
Picture
Ingredients: 
  • 1+/- cup of dry mixed legumes (I use a mix of dried beans, peas & lentils)
  • 1 hot chili pepper (serrano, jalapeno or other hot fresh or dried chile, seeded, minced or to taste)
  • 1-2 cloves garlic or 1/2 tsp Hing (Indian cuisine spice)
  • 1/2 cup fresh cilantro
  • 1 tsp ground coriander
  • 1/2 cup chopped onion
  • 1/4 tsp kosher salt or sea salt
  • black pepper - dash of
  • Vegetable/Grapeseed Oil or pan frying oil of choice - you can also use Ghee and pan fry this way (if you don't mind using this non-vegan ingredient)

Directions: 

  1. Thoroughly rinse beans and remove any unwanted bits or stones, etc
  2. Soak beans in water for up to 24 hours.  I rinse them and re-soak a couple times if I have the time
  3. Once beans have finished soaking drain and rinse thoroughly and place in food processor with all ingredients except the onions and oil
  4. Pulse ingredients being sure to stop occasionally to scrape down the sides until the mixture looks like the pic below (add a couple tablespoons of water - one at a time - if your mixture looks too dry)
  5. Once processed, remove from food processor into a bowl and mix in your chopped onions & pepper. 
  6. Form the processed bean mixture into flat patties (about 1/4" thick)
  7. Fill a heavy-bottomed skillet (cast iron) with a 1/4" of oil - I try not to use so much oil and you can pan fry these with GHEE as well if you prefer to use this non-vegan ingredient (you don't need so much ghee)
  8. Heat oil to 365 -375 degrees (don't let it smoke!) - I test by dropping a morsel of the mixture into the oil - if its sizzles it's ready!
  9. Carefully place a couple of patties in the pan with a spatula and try not to move for a couple of minutes
  10. Fry until browned and then turn patty carefully onto the other side and cook the same.  
  11. Once done, remove and drain over paper towels on wire rack.

Note - these patties do not have to be burnt ... the beans a very tender - just make sure each side is nicely browned. 
Picture
How processed beans should look when done in the food processor
Picture
Be sure to cook in hot oil otherwise patties just soak up all the oil and don't cook:(
0 Comments

Pan Seared Tofu & Thai Noodles

4/28/2013

0 Comments

 
Want a yummy lunch in no time with left overs, to boot? I do! Below is my take on Thai noodles. I make this recipe when I want something yummy and fulfilling - and tasty.  Yes, a peanut butter sandwich is indeed faster to make - but I made this within 20 minutes (and left the clean up for later;)  See my recipe below. 
Enjoy and Eat with gratitude in your heart! 
Picture
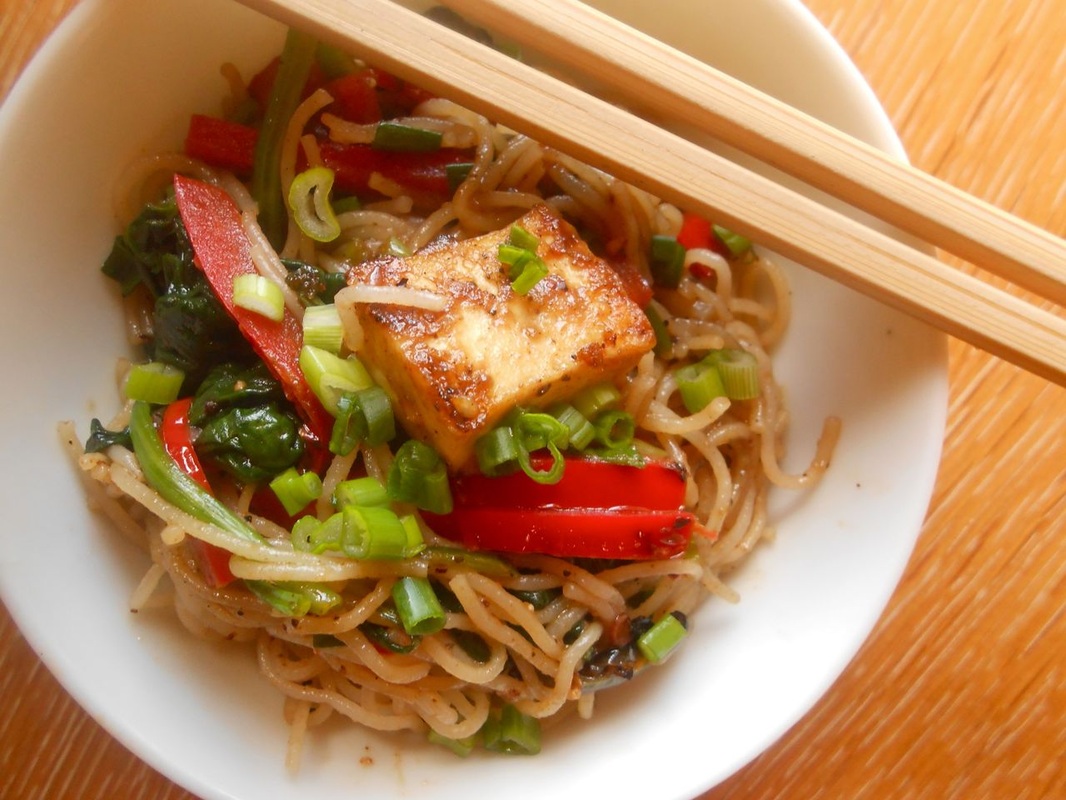
Photo by Margaret Lindgren
Ingredients: 
  • Two packets rice vermicelli (I get my packets in bulk at the Thai store) but they are like a 3" x 3" square of dried rice vermacellie
  • 1 Red or Yellow Bell Pepper - chopped or sliced thinly
  • 1 Hot chili pepper chopped (serrano or something similar) - this is optional if you don't like hot
  • 2 Really big handfuls of baby Spinach
  • Firm Tofu - Half block cut into 1/4" thick squares (I cut width wise then length wise) 
  • Brown Rice flour (for dusting tofu)
  • Green Onion (Scallion) diced - amount to preference - I use a whole bunch at once
  • 1/4 cup Soy Sauce (I like low sodium)
  • Dash Rice Vinegar
  • Dash of Thai Fish Sauce (1 TBSP or so)
  • Sesame Oil 
  • Hing (or 1 tsp minced garlic) 
  • Mince Ginger (1 tsp) - to get fast minced ginger or garlic use a fine grater or planer and grate away
  • Agave nectar - dash  of - or 1/4 tsp honey powder
  • Asian Blend Red Pepper Flakes - or just regular Red Pepper Flakes - all optional based on heat preference


I think it would be nice to soak Tofu (as noted in my Thai me up Spring Rolls recipe) but time is of the essence now and then ... so, it is fine either way. Also, if you are not a tofu fan .... saute' mushrooms with a soy sauce mixture (as noted below) or just in some sesame oil... 

Directions: 
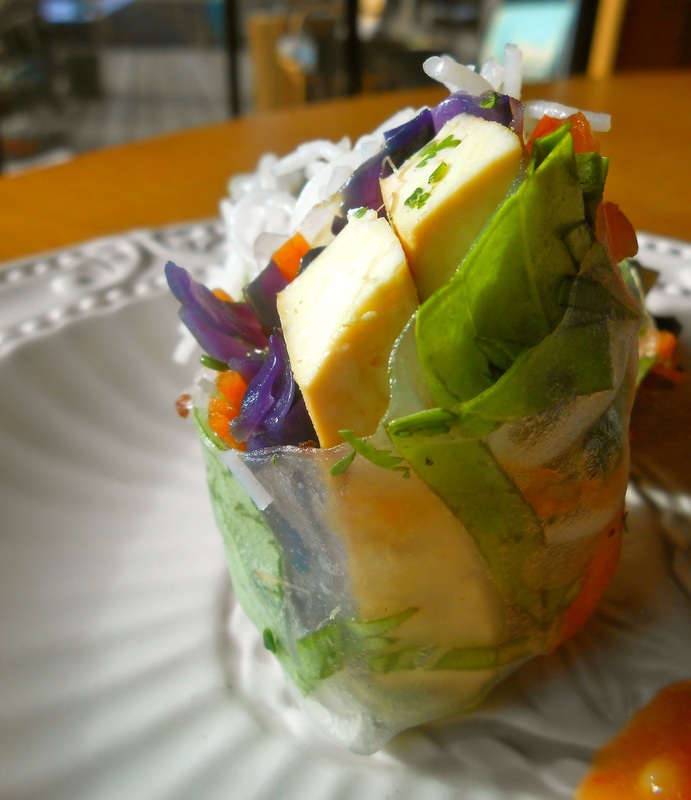
  • Heat 3 cups water until just boiling in pasta pot - add rice vermicelli and cover for 10 minutes or so 
  • Cut Tofu and place in container or sealed plastic bag with about 1 TBSP of brown rice flour - or regular flour - and shake until well coated.  Remove from container. 
  • Heat 1TBSP sesame oil in heavy skillet or Wok on med-high until hot - add tofu such that it lays flat in the pan (you want it to get nice and crunchy) - Heat carefully until it browns on both sides
  • While tofu cooks combine in a small bowl soy sauce, fish sauce, rice vinegar, dash of sesame oil, garlic, ginger and agave (if using sweetner). Stir to combine. Set aside
  • Once tofu is done remove and set aside on plate or paper towels
  • Add a dash of sesame oil back to pan and allow to heat up
  • Add chopped red pepper and chopped green chili pepper and saute - make sure you have fan on for venting when cooking with hot chilies in pan - Cook until red peppers are tender
  • Add spinach with 1 TBSP hot water and cover until limp (couple minutes)
  • Meanwhile, drain rice vermacelli in colander 
  • Add drained rice noodles to stir fry along with soy sauce mixture, reserved tofu and chopped green onion
  • Stir fry for about 3 minutes - and mix well (I like to use Salad Tongs to mix the ingredients) - Increase heat if necessary (don't want it searing, searing hot - but hot enough to keep things cooking quickly & sizzling) 
  • Add any extra spices (your Asian Red Pepper Flakes blend, etc) and mix ... allowing soy mixture to reduce if necessary
  • Turn off heat - fill into serving bowl with chop sticks and have at it. 
NOTE:  Again - add enough rice vermicelli as necessary - if it looks like you have cooked to much rice noodles - don't put them all in at once - just add them to the stir fry in increments and stir in with other vegetables... THEN add your soy sauce mixture once it looks like you have enough.  If you feel like you don't have enough soy sauce mixture - make more ... but I find I have enough once everything gets mixed well. Sometimes I also add a tad more sesame oil if necessary. 

THIS IS SUPER TASTY!!!
0 Comments

Thai me up Spring Rolls!

4/26/2013

0 Comments

 
When we last ventured into the big city we hit the Thai market and got all of our favorite Thai food basics.  My favorite thing to make is Thai Spring rolls.  I make them with whatever I have on hand.  I make a ton and have 'em for lunch and snacks.  I eat like every 2 hours.  So, yeah, I make a lot!  I mix tahini with Thai chile sauce and add a little hot stuff on top of that.  It gives the dip a nice, peanutty & spicy flavor.  I don't roll the prettiest of spring rolls.... but, hey, that's just how I roll.  Check out the recipe below.  It seems like a lot but if you prep it out and create a "production" line with your ingredients... you can pump these out in no time and feed a crowd.
Picture
ElIngredients:  

  • Rice rolls wraps (they are purchased as flat hard rice discs about 6 inches in size) 
  • Tofu - block of firm tofu drained on paper towels
  • Shredded cabbage, carrots or whatever veg you have
  • Roasted Red Pepper or something else different and colorful
  • Rice vermicelli 
  • Basil, mint, cilantro or green onion - use any one of these or all - whatever floats your spring roll! 

Sauce:  Tahini mix with Thai chile sauce (sweet chile) ... to taste preference

Directions: 

  • Cut Tofu into 1/4 thick long pieces
  • Marinate the Tofu for 1 hour (or, if desperate, 20 minutes) in a mixture of 1/4 cup soy sauce with a dash of sesame oil, rice vinegar (or lemon juice), minced ginger and garlic (a good dash each) and a bit of honey powder or agave nectar to slightly sweeten.  
  • Soak the rice vermicelli in warm-to-hot water with a cover for 10 minutes then drain (make sure it is soft)
  • Cut your herb green Chiffonade style (look it up if you are not sure) - basically leaves atop one another, roll tightly and then slice thinly to create thin slivers of each.  Or, if lazy, use the entire leaf 
    • Once tofu is ready, heat a skillet with some sesame oil until hot. 
    • Add tofu along with its marinade to the pan and allow to brown on both main sides on med (flipping only once) - Handle delicately or you will end up with Tofu scramble. 
    • Once tofu is cooked remove and set aside
    • Add shredded veg to pan - saute until wilted and remove from pan - turn stove off
    • Soak 1 Rice roll at a time in flat pie dish filled with hot water (but not too hot). Allow to soak until soft
    • Lay limp rice roll out onto a flat, smooth, thin cotton dish towel... so that you spread it out as a flat round
    • About 1 inch from the edge closest to you place tofu and a bit of shredded veg 
    • Lip the edge closest to you over the tofu and veg and roll over tightly once
    • Now add some of the rice vermicelli (not too much - don't want it bulky) and roll over once more
    • Lastly, add a few leaves of herbal greens or your chopped greens (and red pepper) roll over once
    • Next: fold the sides in on the roll and then finish rolling out until you reach the end.  Be sure to fold in the sides BEFORE you get to the end:))  
    • Cut on the bias (diagonal) - wet your hands slightly if the rolls are totally sticking to your fingers. 

    TA-DA - serve with sauce and have at it!  Enjoy. Eat with Love in your Heart!


0 Comments

Madge's Upper Crust Diner Food with Friends

4/21/2013

1 Comment

 
Last night we had friends over for a vegan-style, Kick Butt meal!! My theme was "Upper Crust Diner Food". 
Our starter was a deeply-mushroomy mushroom soup followed by our main course: A vegan version of a tasty Muffaletta (a New Orleans antipasto-like sandwich normally with meat, cheese, olive relish and more).  I did mine with a locally made crusty baguette (thank you Two Fish) filled with an herbed olive relish, roasted eggplant, roasted red peppers, pickled garlic & spinach. I made the Muffalettas well in advance and weighted the sandwiches down so the bread could soak up all the olive oily goodness.  

And joining the main course: A mixed greens salad with Madge's Miso dressing (minus the ginger) and some roasted fingerling potatoes.  I also included some of my homemade pickled veggies (carrots, cabbage, red onion & hot chili peppers) as an additional tarty side dish. And for dessert ... a Gluten Free Black Pepper spiced shortcake with Black Berry Basil Compote - topped with a cashew whipped vanilla & nutmeg cream!  Can you say ... Yummy Happiness:). Thankfully, our guests were sated and happy, too. 

I am so grateful to have enough food in my life.  Something not everyone has BUT should have.  I always cook with this in mind and am forever grateful for what I am able to put on the table for family & friends.   I only wish I had a better photo to show you - I usually put everything on big platters and let everyone have at it. By the time I pulled out the camera the food was already a little picked over ... but that's how I like it!
Picture
1 Comment

Madge's Miner's Lettuce & Salad Greens Soup

4/18/2013

2 Comments

 
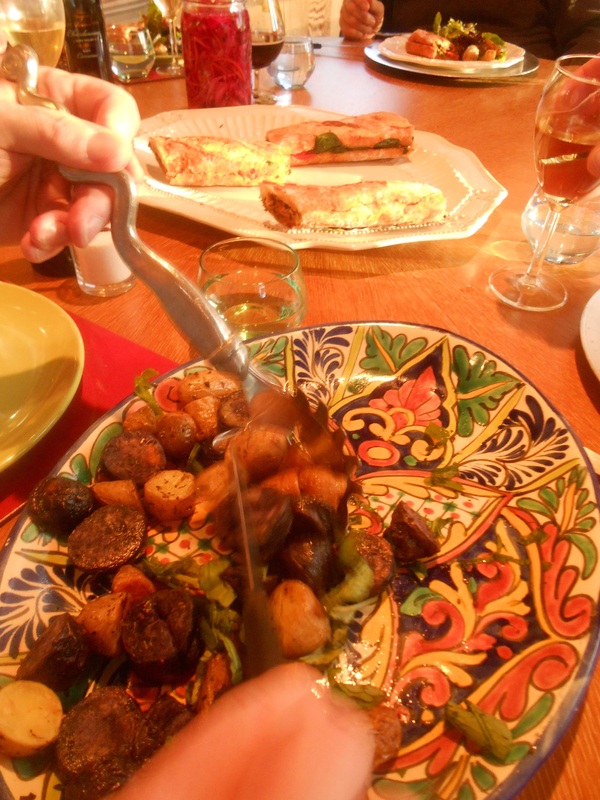
Always remember you are unique ... just like everyone else. - Anon
Back yard Miner's Lettuce & fresh Garden Salad Greens Soup! I love soups!  They are easy on the digestion & our bodies just absorb their nutrients (when cooked properly).  One of my fellow book club members brought me fresh salad greens from her garden (already! What a treat!) and outside my house there was miner's lettuce blooming everywhere.  Ode' to nature's beautiful greens!  I love you!
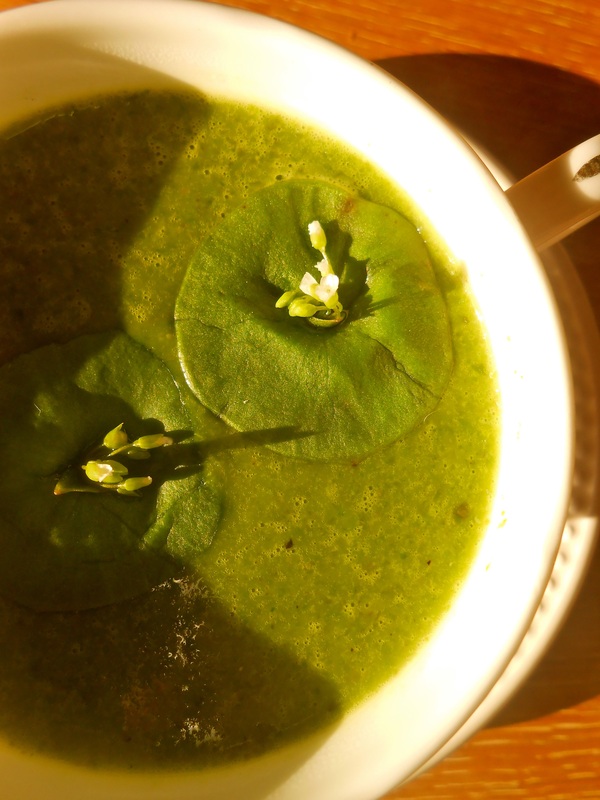
Picture
Ingredients: 

Note:  I soaked my hand-picked miners lettuce in a highly diluted water/vinegar mixture - to debug - then rinsed and drained. 

  • 2TBSP oil 
  • 4-6 cups Mixed Salad Greens (I used mixed salad greens & Miner's Lettuce - only use what you know!)
  • 1/2 Shallot, minced
  • 1/4 tsp Hing (or one clove minced garlic)
  • 3 cups (approximate) Vegetable Broth - Preheated
  • 1/2 cup pre-COOKED rice (brown or sticky white)
  • Salt and Pepper to taste!  

DIRECTIONS
  • Heat oil in soup skillet
  • Add Shallots & garlic (if using garlic)with a tad of salt - and saute until tender (do not brown)
  • Pour preheated broth into Pan and stir in rice
  • Mix in greens - Greens should overwhelm the pot - and should wilt until they are equal with liquid (so make this balance happen by either adding more greens or increasing the water)
  • Add Hing now - if you are using Hing 
  • Allow greens to wilt and soak into liquid - do this briefly - you want them to just begin to leech into broth
  • Puree entire soup or solids (with a ladle of liquid) in blender (be careful with hot liquids - remove inner cap of blender to release heat while blending - (be sure to cover opening of blender lightly with cloth, too) 
  • Return soup to pot and heat briefly on low for a few minutes only ...
  • add Salt and Pepper to taste.  With these greens salt brings out the flavor ... so, salt in increments - allow to sit briefly then taste and adjust... 

This is such an awesome soup ... so hearty and flavorful ... instant Karma!


2 Comments
<<Previous
Forward>>

    ABOUT THIS BLOG!

    I am simply a person with a serious passion for FOOD! I am not a chef, chemist or doctor - I am just a foodie food-head!  The recipes in this blog are things I make for myself, my family and my friends and they have been tested and tried by some of my closest food critics.  This blog has helped me become more aware and appreciative of the food I prepare and share and I am very grateful for this. 

    As for this blog - I have one piece of advice: Food is like our DNA - it is unique and specific to each of us! Add your own flare, energy and pulse and personality to your food.  It is a part of you!  It is who you are.  So, if something doesn't work for you in my recipes then be sure to be fearless and try your own flare... and  share your inspiration with us!  

    Archives

    June 2014
    February 2014
    January 2014
    December 2013
    November 2013
    September 2013
    June 2013
    May 2013
    April 2013

    Categories

    All
    Anytime Meals
    Beans
    Breads And Baking
    Breakfast Meal
    Dessert
    Diner Food
    Granola
    Holiday Treats!
    Hot Pot Recipes
    International Dishes
    Japanese Cuisine
    Meat Balls Vegan Style
    Nuts & Seeds
    Polenta
    Potato Salad
    Protein Cereal
    Sauces/dressing
    Sauteed Veggies
    Seaweeds
    Side Dishes
    Thai Food
    Tofu

    RSS Feed

www.unbeatenpathtours.com  CALL 707 888 6121 
  • Home
  • Guided Experiences
    • ALL TOURS & GENERAL INFO
    • THE SEA RANCH ARCHITECTURE & NATURE
    • REDWOODS TO COAST
    • SIGILS WALKSHOP
    • HIKE, WRITE & DESIGN
    • Breath-Body-Mind
    • STORNETTA LANDS NAT'L MONUMENT
    • SEASCAPES AND WILDFLOWERS
    • ELOPEMENTS
    • BREATH WALK & FOREST BATHING
    • YOGA & CORPORATE RETREATS
    • LARGE GROUP OPTIONS
  • THE SEA RANCH
    • THE SEA RANCH
  • Resilience WALKshops
    • ABOUT OUR WALKSHOPS
    • SIGILS WALKSHOP
    • HIKE, WRITE & DESIGN
    • Breath-Body-Mind
  • RETREAT WORK
  • YOGA
    • ABOUT YOUR TEACHER & GENERAL INFO
    • PRIVATE YOGA SESSIONS
    • SOUND BATHING
    • YOGA STREAMS
    • YOGANATUR - HIKE & YOGA
  • BOOK ONLINE
  • CONTACT+
    • OUR BIO
    • WRITE A REVIEW
    • UNBEATEN PRESS
    • CONTACT US
    • FAQ
    • BLOG
  • Waiver & Policies
  • Buy our Beanie!